Windows 365: Enable and configure Cloud PCs
The following topics discuss how to enable and configure Windows 365 Cloud PCs.
Enable Windows 365 in Nerdio Manager
The following procedure allows you to enable the Windows 365 environment in Nerdio Manager.
Important:
-
For the process to complete successfully, the user who enables Windows 365 must be a Global Administrator.
-
An Intune license must be present in the Entra ID tenant where Nerdio Manager is installed.
-
A Windows 365 license must be present in the Entra ID tenant where Nerdio Manager is installed.
-
Entra ID also requires approval on an application permission request consent page. If the Grant consent on behalf of my organization option is available, be sure to select it.
To enable Windows 365 in Nerdio Manager:
-
Navigate to Intune settings:
-
Classic UI:
-
Navigate to Settings > Integrations.
-
In the Intune tile, next to Current status, select Disabled.
-
-
New UI:
-
Navigate to Settings > Environment > Integrations.
-
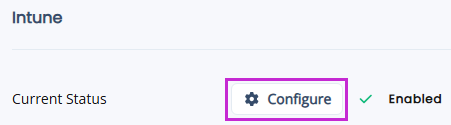
In the Intune section, next to Current Status, select Configure.
-
-
-
Enter the following information:
-
Current Status: Toggle this option On to enable Intune.
Tip: Toggle this option Off to disable Intune.
-
Configurable Features: Select all the desired configurable features and their related permissions.
Note: See Unified Endpoint Management: Intune Integration - Granular Permissions for a deep dive into the features and permissions.
-
Device Visibility Scope Limitations: In this section, select the desired device visibility scope limitations.
-
Device type scope: Optionally, from the drop-down list, select the device type(s) to manage.
Note: By default, all Intune devices are included. Optionally, device management can be limited to AVD hosts, Windows 365 Cloud PC, and/or physical devices.
-
Limit by Entra ID group: Optionally, from the drop-down list, select one or more Entra ID groups to restrict management to include only devices for the users defined within the selected groups.
Note: This option works in combination with the selected Device type scope.
-
Include devices that have no primary user: Select this option to include any devices that have not been assigned to a user.
Note: This option is limited by the selected Device type scope, but ignores any selected Limit by Entra ID group rules.
-
-
-
Once you have entered all the desired information, select Save.
Windows 365 is enabled in your install of Nerdio Manager.
Notes:
-
Nerdio Manager now walks you through the process of creating a provisioning policy. You may cancel this and create a provisioning policy later. See Create a provisioning policy for more information.
-
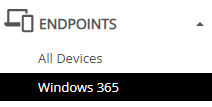
A new Endpoints > Windows 365 option on the main menu is now available. See Hide or display individual Cloud PC hosts page for more information.
-
At the top of the window, use the tabs to navigate to the desired Windows 365 feature.

-
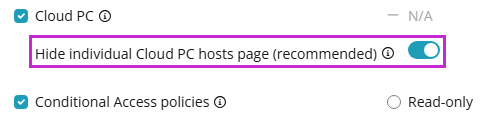
Hide or display individual Cloud PC hosts page
Nerdio Manager allows you to hide or display the individual Cloud PC hosts page.
Note: All the functionality (restart, resize, etc.) is available no matter whether you hide or display the individual hosts page.
-
When you hide the individual Cloud PC hosts page:
-
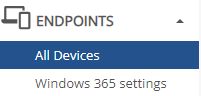
The Cloud PCs hosts are displayed in Endpoints > All Devices, which you can filter for Windows 365 Cloud PCs only.
-
Endpoints > Windows 365 settings contains only settings and no hosts.
-
-
When you display the individual Cloud PC hosts page:
-
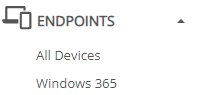
The Cloud PC hosts are displayed on the Endpoints > Windows 365 > Cloud PCs tab.
-
Endpoints > Windows 365 also contains the settings.
-
The Cloud PC hosts are also displayed in Endpoints > All Devices.
-
To hide or display the individual Cloud PCs hosts page:
-
Navigate to Settings > Environment, and then select the Integrations tab.
-
Expand the Intune section, and then next to Current Status, select Configure.
-
Select the Hide individual Cloud PC hosts page toggle to enable or disable this feature (blue is enabled, and gray is disabled).
-
Select Save.
Configure a Windows 365 network connection
Windows 365 Enterprise Cloud PCs require Active Directory with Hybrid Entra ID sync.For that to work, you need to configure a network connection.
To configure a Windows 365 network connection:
-
Navigate to Endpoints > Windows 365 settings or Windows 365.
-
On the Network Connections tab, select Add network connection.
-
Enter the following information:
-
Name: Enter the name of the network connection.
-
Network type: From the drop-down list, select the network type.
-
Resource Group for cloud PC network cards: From the drop-down list, select the resource group to contain the network interface cards of the Cloud PC desktops.
-
Network: From the drop-down list, select the desired network and subnet.
Note: The Cloud PC desktops that are created on the selected network are created in the Azure region associated with the network.
-
Active Directory: From the drop-down list, select the AD profile.
This provides the credentials when creating the computer objects as the Cloud PCs come online. AD profiles can be modified under Settings > Integrations in Nerdio Manager.
-
-
Once you have entered all the desired information, select OK.
After several minutes, the network connection is created.
Note: After the network connection is created, the Windows 365 service initiates automatic health checks to validate that the provisioning is successful. The health checks may take 30-60 minutes or longer to complete. These must pass before any Cloud PC desktops may be provisioned.
Manage Windows 365 network connections
Nerdio Manager allows you to manage Windows 365 network connections.
To manage Windows 365 network connections:
-
Navigate to Endpoints > Windows 365 settings or Windows 365.
-
On the Network Connections tab, locate the network connection you wish to work with.
-
You can perform any of the following functions:
-
Select the Name to see the configuration information.
-
Select the VNet to open it in Azure.
-
Select the Domain to view the domain the network is connected to.
-
Select the Status to see the test details.
-
Select Edit to change the network connection.
-
From the action menu, select Health check to perform a health check on the network connection.
-
From the action menu, select Delete to delete the network connection.
Note: Microsoft tests this network on a regular basis to make sure it is still healthy and functioning. If there is a problem with the network, review the test details to find and fix the issue. For details, see Azure network connection overview.
-
Create a provisioning policy
This feature is available only in the Nerdio Manager Premium edition.
A provisioning policy is a combination of a network connection with an image. It then maps the combination to an assignment of security groups in Entra ID. This enables the Cloud PC desktops to be provisioned.
To create a provisioning policy:
-
Navigate to Endpoints > Windows 365 settings or Windows 365.
-
On the Provisioning Policies tab, select Add policy.
-
Enter the following information:
- Name: Enter the name of the policy.
-
Description: Enter the policy's description.
-
License type: From the drop-down list, select the license type.
-
Cloud PC image: From the drop-down list, select the Cloud PC image. You may select either a Managed Image (created by Nerdio Manager in the Desktop Images menu), a Microsoft Gallery Image, or any of the custom images uploaded to Endpoint Manager directly.
-
Language & Region: From the drop-down list, select the language and region.
-
Network connection: From the drop-down list, select the desired network connection. If only one network connection is available, it is selected by default.
Note: From the drop-down list, you can select Built In Network > Microsoft Hosted Network to provision Cloud PCs without on-premises AD domain controllers. Both customer-managed and Microsoft-managed VNets are supported. Cloud PCs provision faster and join Entra ID automatically.
-
Once you have entered all the desired information, select OK.
The provisioning policy is created.
Edit a provisioning policy
Nerdio Manager allows you to edit an existing provisioning policy.
To edit a provisioning policy:
-
Navigate to Endpoints > Windows 365 settings or Windows 365.
-
On the Provisioning Policies tab, next to the desired provisioning policy, select Edit.
-
Enter the following information:
-
Force apply region change: Select this option to force apply a change to the provisioning policy's region.
Warning: Cloud PCs are shutdown during this process. Users are disconnected and any unsaved work is lost. Cloud PCs are unavailable for all actions until the region change is complete. The process may take several hours. See Cloud PC move for details.
-
See Create a provisioning policy for details about the other parameters.
-
-
Once you have entered all the desired information, select OK.
Force apply a configuration policy
Nerdio Manager allows you to forcibly apply a configuration policy or to have their SSO profile changed, all without the need to reprovision desktops.
To force apply a configuration:
-
Navigate to Endpoints > Windows 365 settings or Windows 365.
-
On the Provisioning Policies tab, next to the desired provisioning policy, from the action menu, select Force apply configuration.
-
From the dialog box, select one of the following options:
-
Microsoft Entra single sign-on for all devices
-
Region or Azure network connection for all devices
-
Region or Azure network connection for select devices.
-
If you choose to force apply configuration changes to select devices only, a searchable list of available devices will appear. Select one or more devices to force apply the configuration changes to them.
-
If you force apply changes to region or Azure network connection, affected devices will be shut down during the process. Users will be disconnected and any unsaved work will be lost. The device(s) will be unavailable for all actions until the region change is complete. The process may take several hours. You can monitor the progress from the task status page.
Notes:
-
-
Select OK.
Assign licenses to users
Once you have created the necessary provisioning policies, you can assign licenses to Cloud PCs users.
To assign licenses to users:
-
Open a browser and navigate to your Microsoft 365 admin portal. (This is not your Azure admin portal.)
-
Purchase and assign a Cloud PC SKU to a user.
Notes:
-
The SKU determines the size of the desktop VM the user receives.
-
If the user is a member of a user group that has been assigned to a provisioning policy, and the provisioning policy has a healthy network connection and an assigned image, the desktop automatically comes online in 30-60 minutes.
-
Access assigned Cloud PCs
Once Cloud PCs are provisioned, the users can access them.
To access your assigned Cloud PC:
-
Open a browser and navigate to windows365.microsoft.com or cloudpc.microsoft.com. Alternatively, use the AVD Remote Desktop Client.
-
Sign in with your Entra ID credentials.
-
In the user self-service portal, all the assigned Cloud PCs are displayed.
-
Select Open in browser to open the desired Cloud PC.
Manage Cloud PCs
You can manage provisioned Cloud PCs. Specifically, from the Endpoints > Windows 365 page, navigate the following tabs to:
-
Assignments: View desktops grouped by provisioning policy. This view simplifies large-scale management of your Cloud PC devices.
-
Provisioning Policies: Add new policies, or review, edit, or delete existing ones. You can also force policy configurations to apply.
-
Network Connections:Add new network connections, or review, edit, or delete existing ones. You can also run health checks.
-
User Settings: Add new user settings, or review, edit, or delete existing ones.
-
Cloud PC Alerts: Review any Cloud PC-related alerts.
To manage Cloud PCs:
-
Go to Cloud PCs:
-
If you hide the individual Cloud PC hosts page, navigate to Endpoints > All Devices.
-
If you display the individual Cloud PC hosts page, navigate to Endpoints > Windows 365, and select the Cloud PCs tab.
-
-
Use the Cloud PCs list's search and filter capabilities to locate the desired device(s).
-
Locate the device you wish to work with, and then do the following:
-
Name: Select the device name to view the device details.
Note: Devices with a name of Not provisioned indicate the user has a Cloud PC license assigned, but is not included on a provisioning policy.
-
Device Details: View the device’s configured hardware such as join type, OS, and storage.
-
Provisioning Details: View the assigned Windows 365 license, provisioning policy, network connection, and more.
-
Compliance: View device compliance status, including policy and application compliance.
-
Sync: Check the most recent synchronization details for the device.
-
Additionally, from the action menu, you can perform the following tasks:
-
Sync: Select to perform the device synchronization.
-
Quick scan: Select to run a quick scan of the device.
-
Full scan: Select to run a full scan of the device.
-
Change primary user: Select to change the primary user of the device.
-
Update Windows Defender: Select to let Windows Defender update the malware definitions for this device.
-
Rotate local admin password: Select to rotate the local admin password.
-
Restart Cloud PC: Select to reboot the device.
-
Reprovision Cloud PC: Select to discard the current device and rebuild it.
-
Restore Cloud PC: Select to restore the Cloud PC from a restore point.
-
Resize Cloud PC: Select to change the assigned Cloud PC license SKU.
-
-